The Latest Tag Management System

Introduction
We continue to share key changes in the latest Linken Sphere update.
Major interface changes were already introduced back in December 2024 — that’s when Linken Sphere 2 was released, a fully reimagined version of the product. We considered numerous user scenarios and made many features more convenient and faster. But as often happens with live systems, some elements require further refinement — tags became just such a case.
Now we’re ready to show how the tagging experience has evolved. This isn’t just a visual refresh — the new implementation of tags is purpose-driven: to speed up navigation, free up screen space, and provide more flexibility for both individual and team use.
We’ve gathered everything important about the new tagging system: what’s changed, why it matters, and how it can help you work faster and more efficiently.
What’s New?
Visual Representation
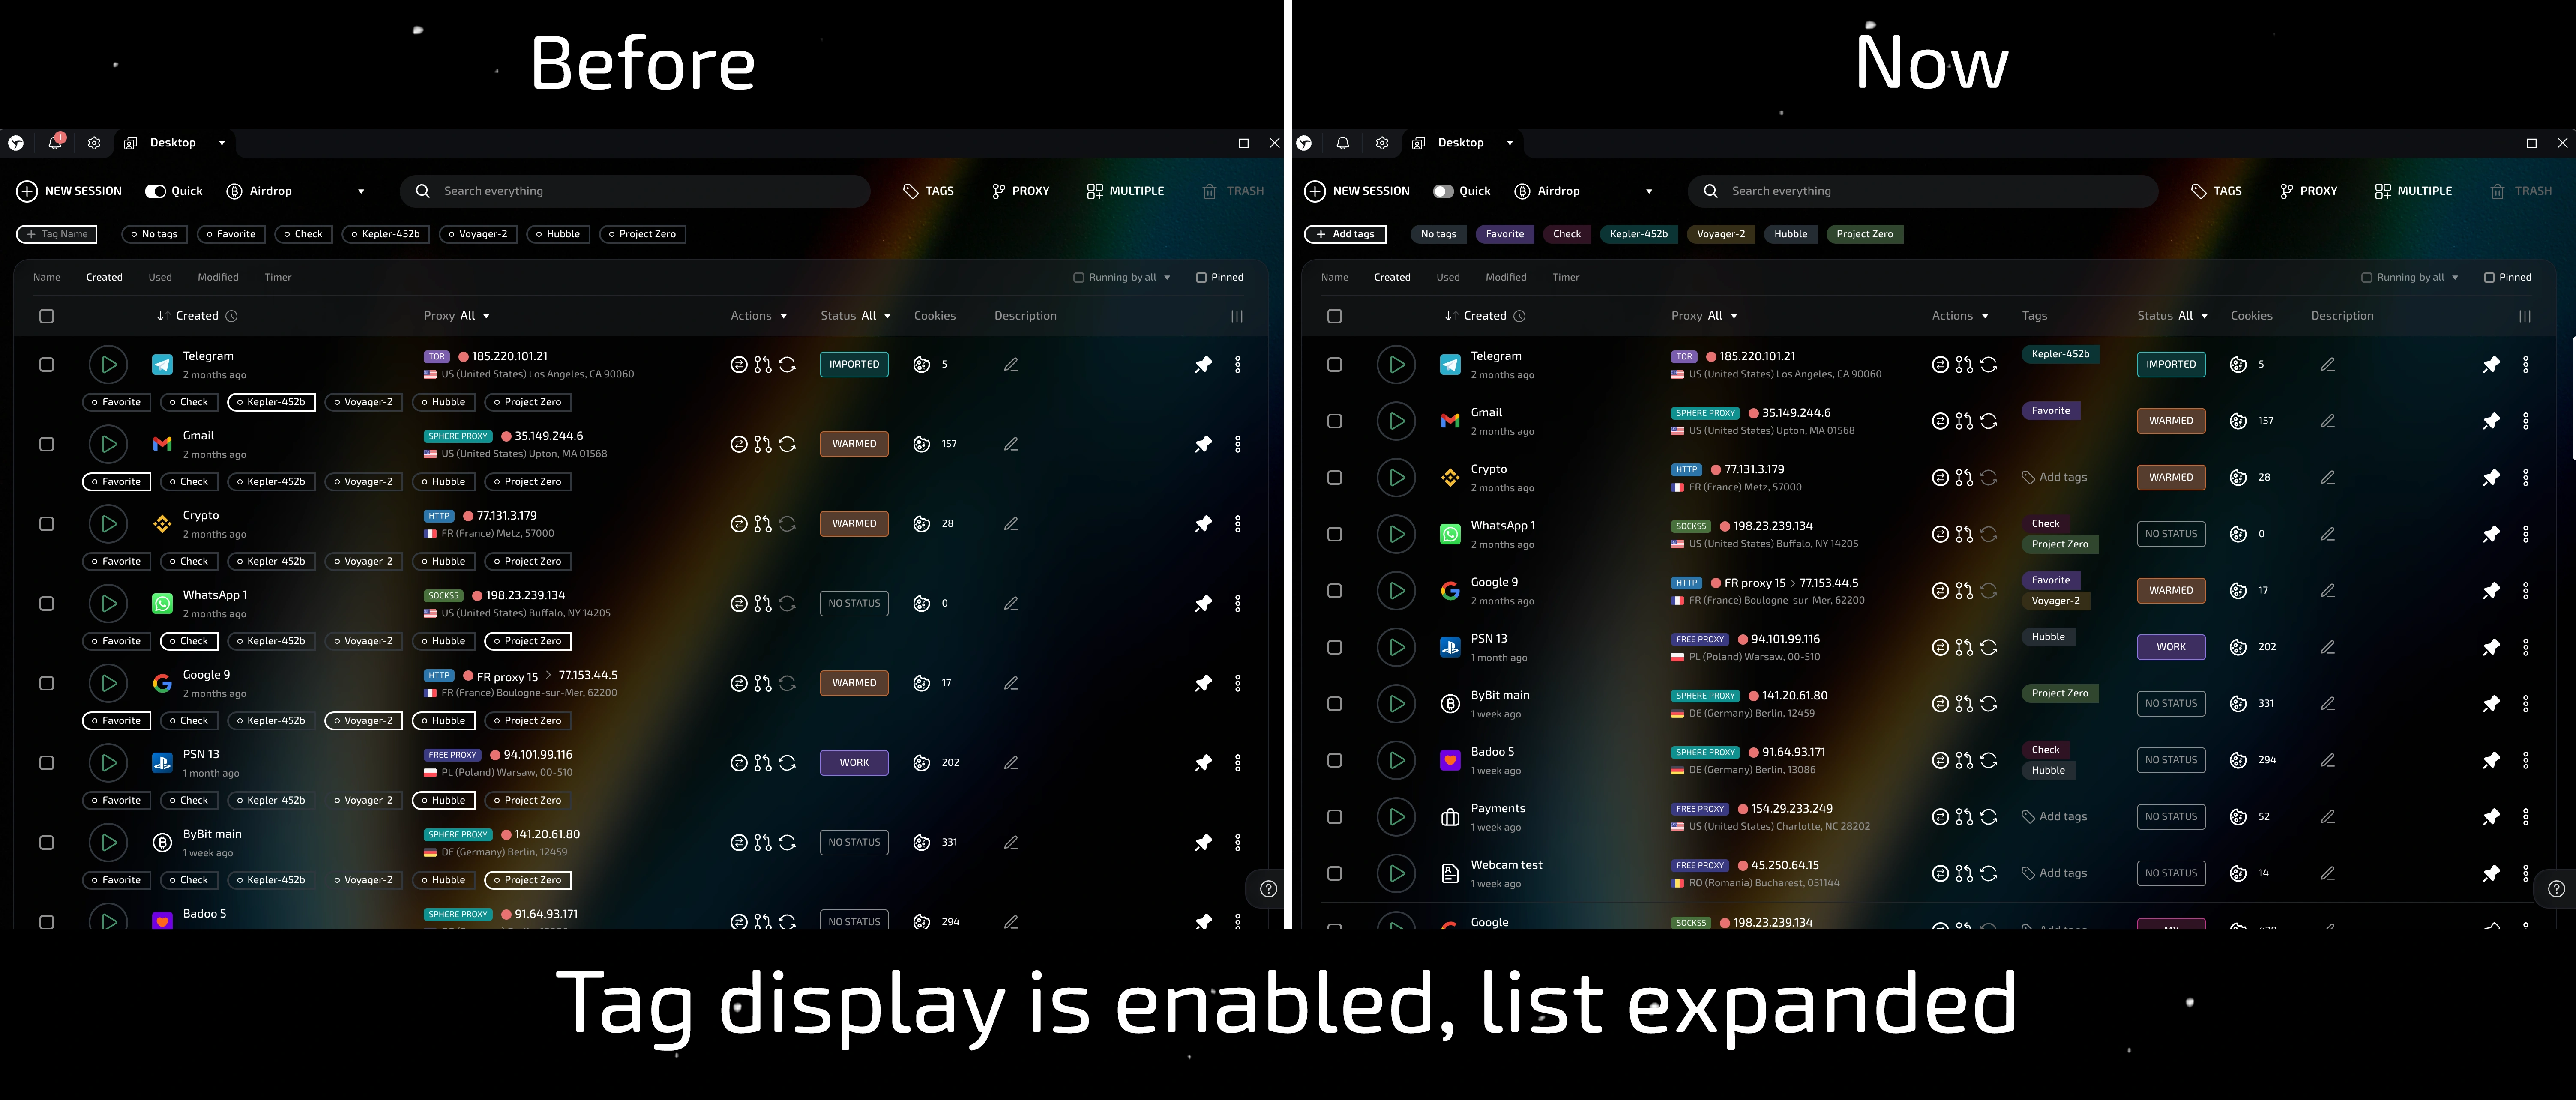
The first thing you notice when opening the new version is the updated look of the tags.
Efficient use of space is key to a user-friendly interface — especially in tools where every second and pixel matters. A modern antidetect browser must be not only functional but also intuitive: delivering maximum information without distracting from the core task. Think of it like a spaceship control panel — everything you need should be in plain sight, yet nothing should get in the way.
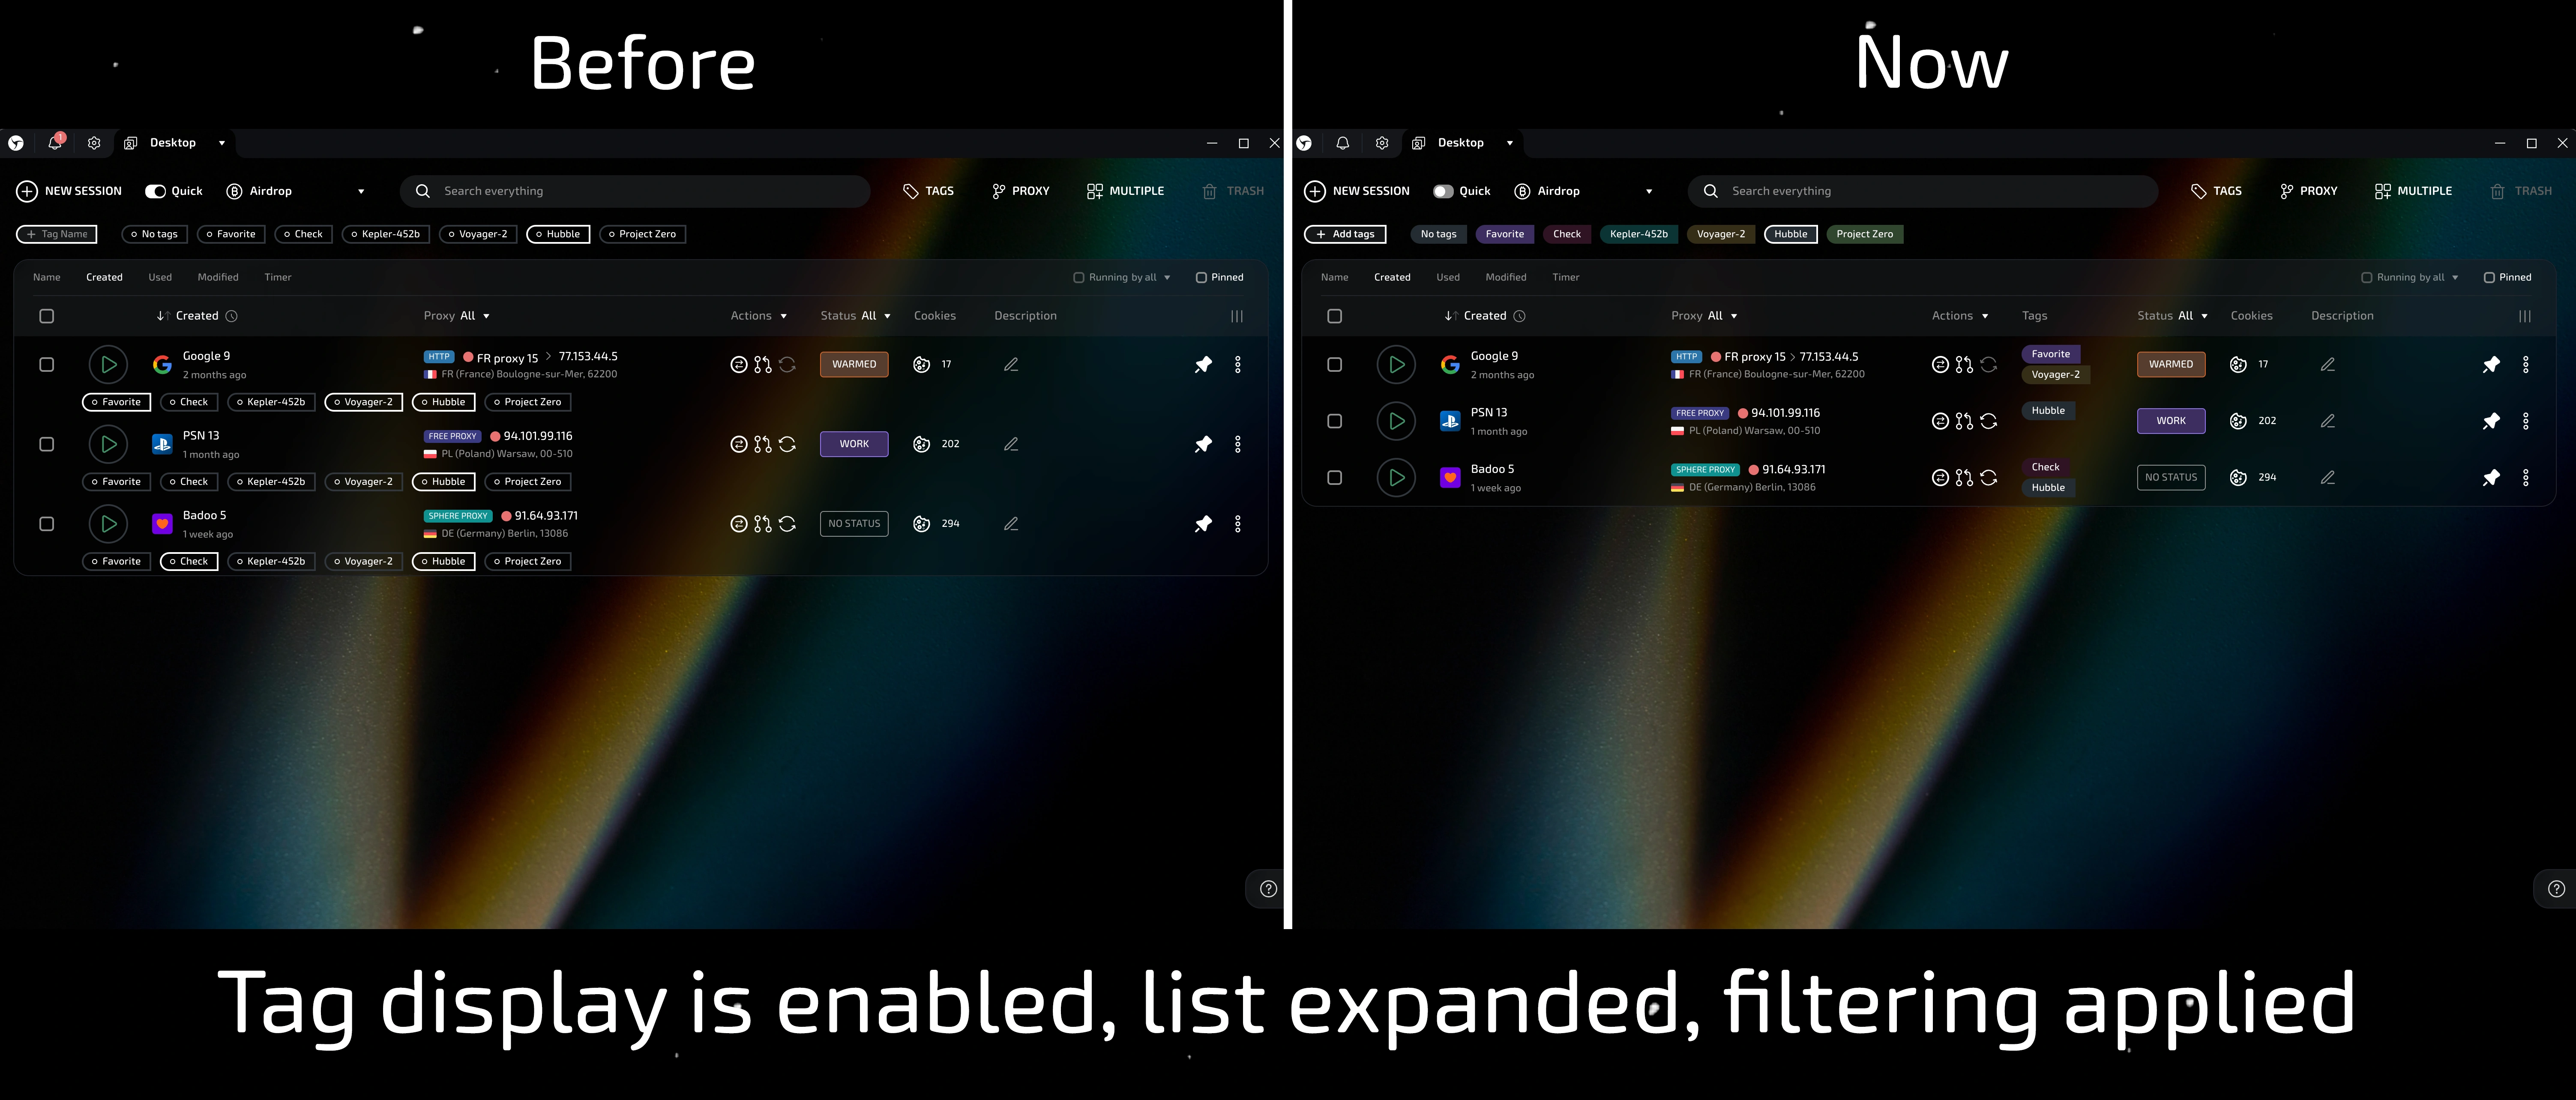
We redesigned the tag display: previously, they were applied with a single click but took up too much space and were sometimes confusing. Now tags have their own dedicated column, allowing more sessions to fit on the screen and simplifying navigation. At the same time, we kept what matters — managing tags remains fast and easy, without unnecessary clicks.
You can assign tags in two ways:
- Via the quick tag edit menu
- Via session settings
Additionally, you can now assign different colors to tags — making them easier to distinguish and helping organize your workspace.
Transferring Tags with Sessions
In Linken Sphere, each workspace is an isolated desktop with its own sessions, presets, proxies, statuses, and tags. This approach lets you clearly separate tasks, processes, and directions within a single account or team.
Previously, tags were not directly tied to sessions, so they would be lost when moving between desktops or sharing with other users. We’ve fixed that: now tags are saved and transferred automatically along with sessions.
This is especially important for teams, where different users work on different desktops with custom setups and access levels.
Additionally, tags can now be copied between desktops even without moving sessions. This is useful when you need to replicate the tag structure or organization quickly.
How to copy tags to another desktop:
- Open the tag management panel and click "Add tags"
- Select "Copy to desktop"
- Select the target desktop
- Click "Copy" — tags will be transferred
Custom Tag Order
You can now customize the order in which tags are displayed — move important ones to the top and structure your workspace according to your priorities.
The specified order will be used both in the top control panel and in the session status column. This is especially useful when working with a large number of tags and needing a clear visual hierarchy.
How to reorder tags:
- Click the "Tags" button in the top right to open the tag management menu
- Click "Add tags"
- Drag and drop tags into the desired order
- Click "Save" to apply changes
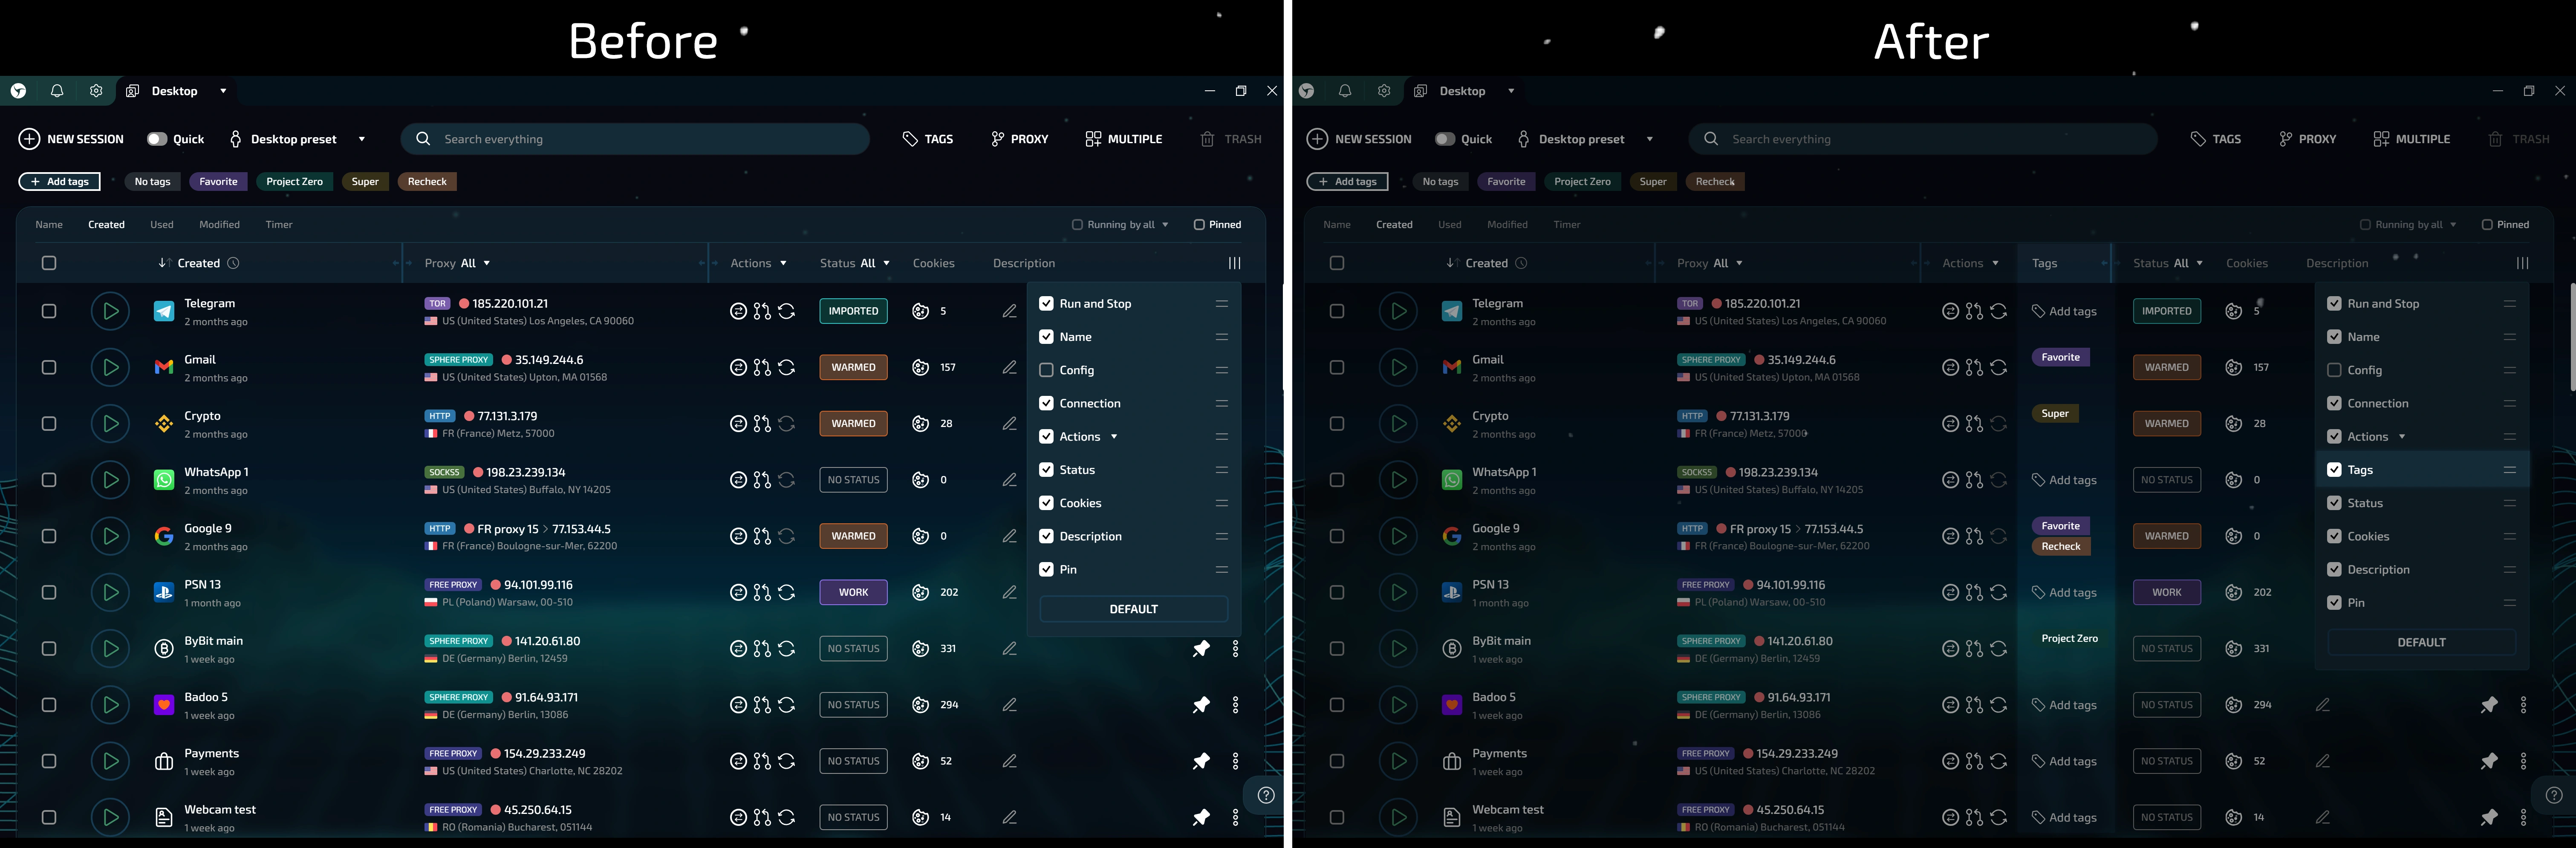
Tag Display Management
You still have full control over your workspace. Display only the data relevant to your current task and hide anything unnecessary.
How to manage tag display:
- Click the "Tags" button in the top right corner — the tag management panel will open
- To show tags in the session list, go to the column settings (three vertical bars in the top right corner) and check Tags
Using Tags in Presets
Besides sessions, you can now assign tags directly in presets.
Any session created from such a preset will automatically inherit the selected tags. This is helpful if you already know how you plan to organize your sessions.
How to add tags to a preset:
- Open the preset settings
- Select the desired tags
- Click "Save preset"
Migration Notes
Due to the global update to the tagging system, some users may encounter specific migration-related issues.
If you don’t see the "Tags" option in the visible column settings, click the "Default" button.
After that, you’ll be able to activate tag display alongside your sessions.
Conclusion
We’re carefully listening to your feedback — this updated tag system is a direct result of your requests and our effort to make a powerful tool even more user-friendly.
Navigation in an antidetect browser should be fast and seamless. While other tools may require three clicks just to assign a tag, in Linken Sphere you simply open the menu once and apply all the tags you need. It doesn’t just save minutes — it saves your attention. And that boosts productivity.
This new tag implementation isn’t just a UI upgrade. It enables new workflows, more flexibility, and adaptability to any working style. Even if you already use tags actively, you’ll likely find this update significantly improves your experience.
Modern tools for professionals should be smart, efficient, and visually balanced — and we’re committed to making Linken Sphere exactly that.
We’re moving forward. Thank you for being with us!